Asbestos Register
1. Overview
Asbestos must be carefully identified, monitored, and managed to protect health and ensure compliance with safety regulations.
The Asbestos Management module within the system provides a structured and compliant approach to managing identified asbestos. It enables users to;
The Asbestos Management module within the system provides a structured and compliant approach to managing identified asbestos. It enables users to;
- Record asbestos locations, materials, and risk levels.
- Manage ongoing inspection, monitoring, and removal requirements.
- Supports approval workflows to ensure data accuracy and accountability.
- Creation and tracking of actions such as inspections, remediation work, or engagement of licensed removalists.
- Automated email notifications help ensure that key tasks and compliance obligations are completed on time and that stakeholders remain informed.
2. Who is This For?
- System Administrators
- Managers
- Health and safety teams
- Maintenance and Operations staff
- Users who have access to Asbestos Register
3. Prerequisites
- Have access to WHS Monitor account
- Have access to Asbestos Register
4. Step-by-Step Instructions
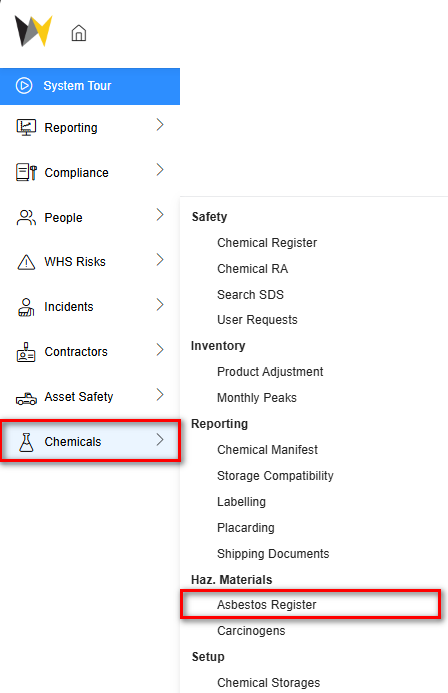
1. Navigate to Chemicals from side menu and select Asbestos Register
2. The Asbestos Register displays a list of all asbestos records stored in the system.
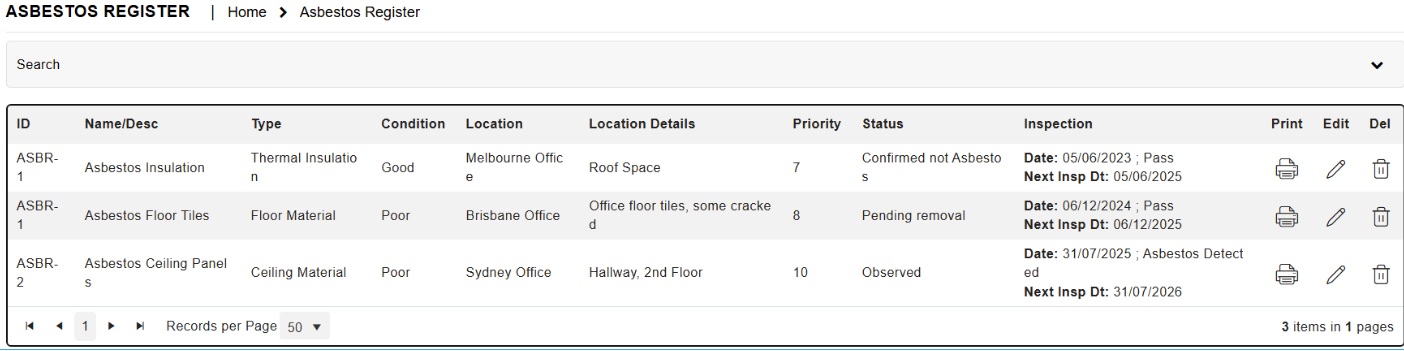
2. The Asbestos Register displays a list of all asbestos records stored in the system.
3. Available Actions in the Register
Actions | Icon | Function |
Print | Allows to print or download the register as a whole including all records. | |
Print | Allows to print or download individual asbestos record. | |
Edit | Allows to edit existing records | |
Delete | Allows to delete records | |
Add New | Allows to add new asbestos record to the register |
4. Editing an Existing Record - select the Edit icon on a record in the register
5. To add new Record select add new
6. Completing record details: Complete the record components. Click on the tabs below to see a summary of the information required.
Details Tab
Inspection History
Removal History
Corrective Actions
Details Tab
Fill in basic details of the asbestos
- Name/Description: Enter record name
- Type/ Sub-Type:Enter in the Asbestos Type with some identifiable information (eg Friable/crushable, powdery, integrated into ceiling panels/tiles).
 Use the button
to add new types.
- Is it friable?: Tick whether the asbestos is Friable.
- Condition: Enter in the Condition of the asbestos (eg Integrated and minor hazard if left undisturbed).
- Size/Qty: Enter in an estimated Size/Qty of the asbestos (eg 300 kg).
- Location Details: Select the asbesto's predominant Location where it is found
- Identification Date: Enter in the Identification date in dd/mm/yyyy format (eg 01/07/2025). Alternatively, you can select the date:
- Risk Priority: Indicate a Risk Priority from 1 to 10, where 10 would be the urgent.
- Status: Select a Status applicable
- Comments: Enter in Description and Comments, if applicable
- Attachments: If applicable, you may wish to upload relevant files such as documents or photos in the ATTACHMENTS section.
- Requirements: Fill in the REQUIREMENTS section:
- If applicable, tick the Policy and procedures are established to control and prevent exposure checkbox.
- If you tick Requires inspection, you should indicate the frequency required from the Required inspection frequency (eg Annual).
- If required to link Risk assessment conducted, tick the Risk assessment conducted? - Responsibilities and Approval
Responsibility for a record can be assign to a specific using Person Responsible. These dropdowns will be populated with values from Employees register .
Add Responsibilities and Approvals button can be used to capture signatures. Users can tick appropriate checkboxes with following options: - Checked by
- Authorised By
- Approved By
Some of the options may be limited based on relevant user permissions.
Inspection History
On the Inspection History page.
- To add new inspection record
- Click Add New in the Page Tool Bar.
- Fill in basic details:
- Inspection Type: Use this button
to add new type.
- Inspected By
- Inspector Details
- Inspection Date
- Inspection Frequency
- Next Inspection Date
- Cost
- Test Result
- Select Test Result
- Details and comments
- Save
- To add action to the record, select Add Action button
- To upload attachments, select Upload icon
Removal History
To manage Asbestos Removal:
- Click Add New in the Page Tool Bar or Edit existing record
- Fill in basic details:
- Removal Date From/To
- Duration
- Removed by
- Removalist details
- Removalist has obtained approval prior to removal work?
- Clearance certificate/advice form // Date
- Disposal location
- Comments
- Save
- To upload attachments, select Upload icon
- Save
Corrective Actions
Actions or Corrective Actions tab allows to view all corrective actions created for a given form. Edit icon allows users to see and update details of actions.
More information on Corrective Actions can be found here: Creating an action
5. Expected Outcome
- Understand the importance of identifying, monitoring, and managing asbestos
- Know who the Asbestos Management module is intended for
- Be able to navigate to the Asbestos Register within the system
- Confidently add, edit, print, and delete asbestos records
- Maintain accurate, up-to-date asbestos records in line with safety and compliance requirements